Quickstart
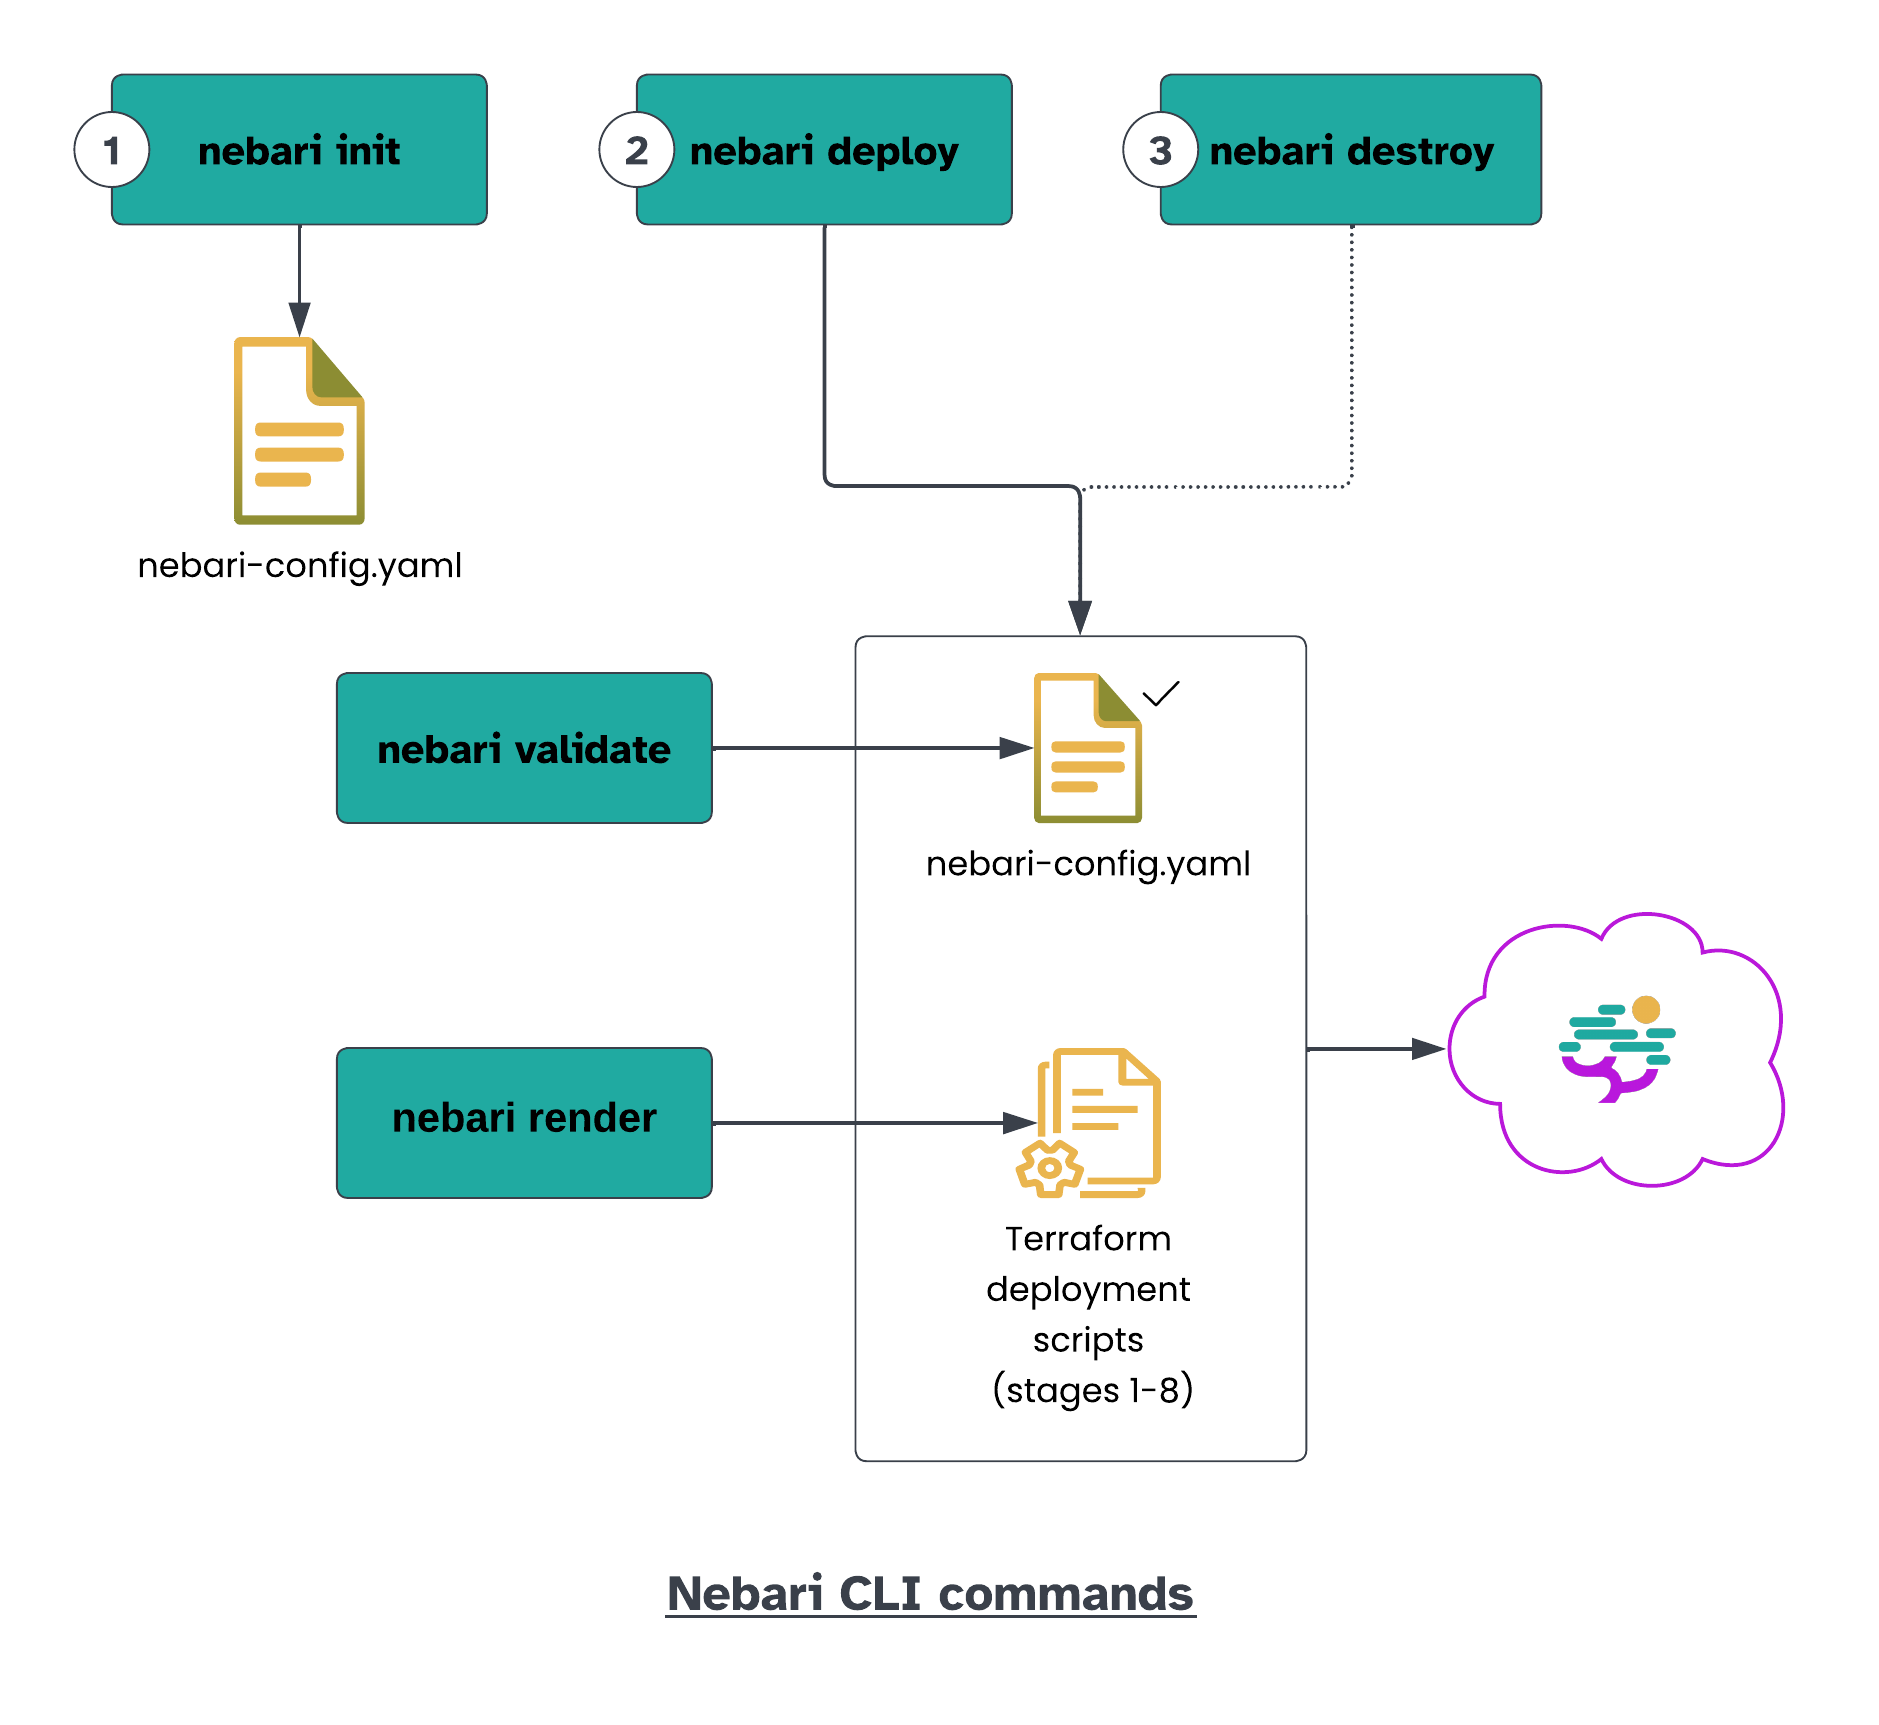
This is a quick Nebari CLI reference. If you're new to Nebari, start at Installing Nebari.

Initialize
Begin by creating a new project directory:
mkdir <project-name>
cd <project-name>
Create the nebari-config.yaml file using the guided init wizard:
nebari init --guided-init
Or, if you know the initialization requirements and have set up the environment variables, you can directly run the nebari init command with the necessary flags.
Project naming conventions
In order to successfully deploy Nebari, there are some project naming conventions which need to be followed. Below we summarize the format requirements for the most common cloud providers:
- Letters from A to Z (upper and lower case) and numbers are allowed;
- Special characters are NOT allowed;
- Maximum accepted length of the name string is 16 characters;
- If using AWS names SHOULD NOT start with the string
aws.
Each cloud provider has its own naming conventions which in some cases may be more restrictive or less restrictive than the ones listed above. For more information, refer to the Initializing Nebari section in the "How to Deploy ..." documentation for your chosen cloud provider.
Download the service account key file for your Nebari project, and set the following environment variables:
export GOOGLE_CREDENTIALS="path/to/JSON/file/with/credentials"
export PROJECT_ID="Project ID"
Create nebari-config.yaml with:
nebari init gcp --project projectname \
  --domain domain \
  --auth-provider password
Download the file with the Access Key ID and Secret Access Key provided by your IAM role, and set the following environment variables:
export AWS_ACCESS_KEY_ID="Access Key ID"
export AWS_SECRET_ACCESS_KEY="Secret Access Key"
Create nebari-config.yaml with:
nebari init aws --project projectname \
    --domain domain \
    --auth-provider password
Provide authentication credentials to Nebari by setting the following environment variables:
export DIGITALOCEAN_TOKEN=""          # API token required to generate resources
export SPACES_ACCESS_KEY_ID=""        # public access key for access spaces
export SPACES_SECRET_ACCESS_KEY=""    # the private key for access spaces
Create nebari-config.yaml with:
nebari init do --project projectname \
  --domain domain \
  --auth-provider password
Provide authentication credentials to Nebari by setting the following environment variables:
export ARM_CLIENT_ID=""        # application (client) ID
export ARM_CLIENT_SECRET=""    # client's secret
export ARM_SUBSCRIPTION_ID=""  # Available at the `Subscription` section under the `Overview` tab
export ARM_TENANT_ID=""        # Available under `Azure Active Directories`>`Properties`>`Tenant ID`
Create nebari-config.yaml with:
nebari init azure --project projectname \
  --domain domain \
  --auth-provider password
Validate (optional)
After creating the nebari-config.yaml file, you can customize it. The Nebari package uses Pydantic for schema validation. To ensure your customizations are valid, run:
nebari validate -c nebari-config.yaml
note
Extensions built using the Nebari Extension System may extend the Nebari schema. If you are intending to use an extension and nebari validate returns an error Extra inputs are not permitted, ensure that the the correct versions of the extensions you intend to use are installed in your active Python environment.
note
This command is automatically run when you deploy.
Render (optional)
You can generate the (Terraform) deployment workflow scripts with:
nebari render -c nebari-config.yaml
This is the actual step that loads the stage classes/models and generates physical IaC files based on your Nebari config file and installed package versions. It is not necessary to manually run a render to deploy. However, it can be useful (especially if you use a GitOps workflow with GitHub Actions or GitLab CI/CD) to review the effects of config files changes on the resulting IaC before deploying.
note
This command is automatically run when you deploy.
Deploy
You can deploy your Nebari instance to the cloud (selected in the previous step) with:
nebari deploy -c nebari-config.yaml
You may need to set up necessary DNS records (with a DNS provider of your choice) for your chosen domain to proceed if you see:
Take IP Address 12.312.312.312 and update DNS to point to "your.domain" [Press Enter when Complete]
If you use Cloudflare, you can set up automatic DNS provisioning.
Create a Cloudflare API token and set the following environment variable:
export CLOUDFLARE_TOKEN="cloudflaretokenvalue"
Use the --dns-auto-provision flag with the Nebari deploy command:
nebari deploy -c nebari-config.yaml \
  --dns-provider cloudflare \
  --dns-auto-provision
It can take up to 30 mins for the deploy command to execute.
Destroy
To delete all your Nebari resources, while preserving the nebari-config.yaml file, run:
nebari destroy -c nebari-config.yaml
It can take up to 30 mins for the destroy command to complete.
tip
If you deployed Nebari on the cloud, verify if the relevant resources were destroyed and manually delete anything that was not destroyed.
If you face any issues with the commands, check out the Troubleshooting guide.